In my previous article on setting up the Raspberry Pi as a web server, I explain how to configure Apache and search log files for "footprints" from the IP requests that have been made to your web server. Now, I would like to discuss protecting your web server from becoming a victim to a potentially malicious attack.
Keep your Pi updated!
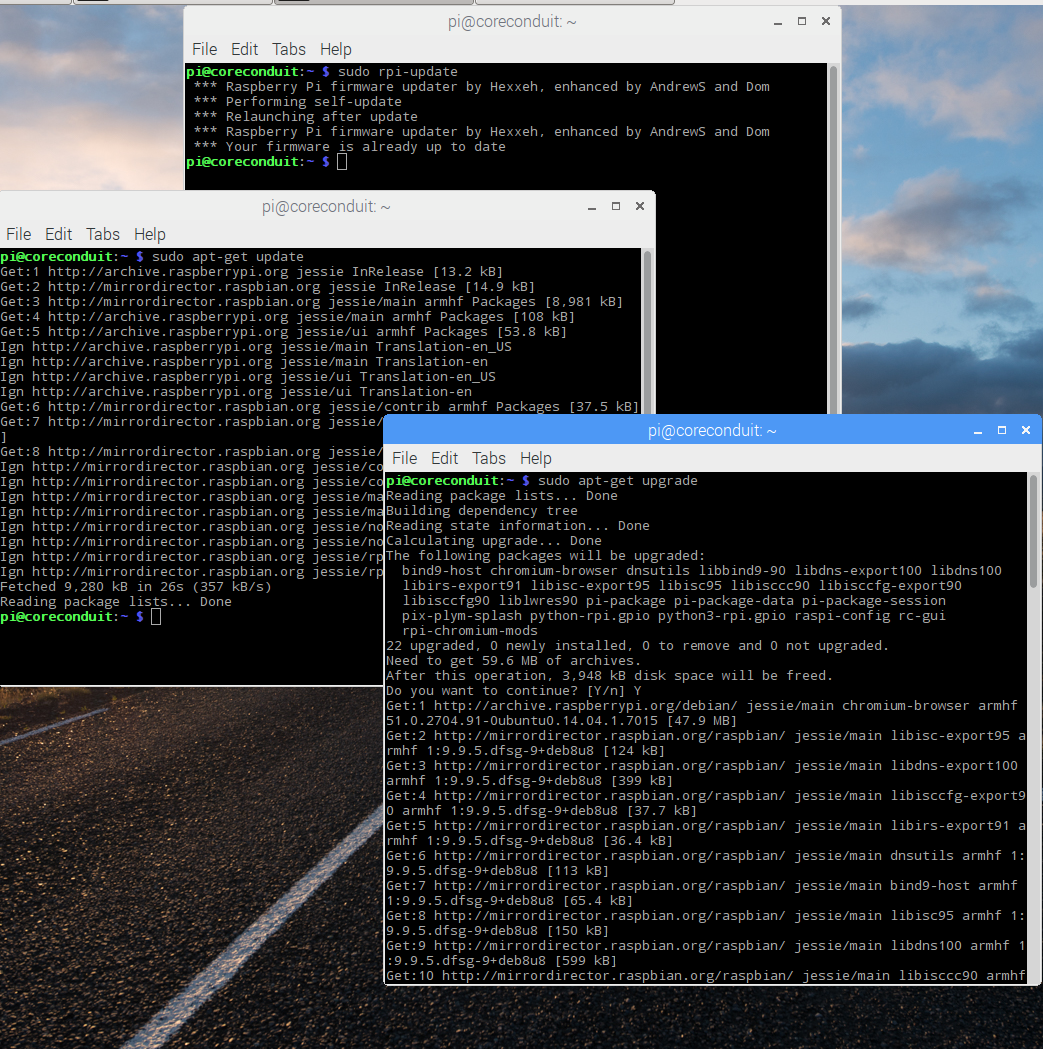
sudo apt update
sudo apt full-upgrade
★ Updated: The original article used rpi-update which was necessary for firmware updates on very old systems. Modern Raspberry Pi OS handles firmware updates through the standard apt system. Use apt full-upgrade (not just upgrade) to ensure kernel and firmware are updated. Only use rpi-update if you specifically need bleeding-edge firmware.
Now, you've got the latest and greatest firmware and software!
Pi Passwords
Ideally, we would disable the default pi account, at the very least, set the default password for your pi account. Another major in-security is that most users have SSH (Secure Socket sHell) and VNC (Virtual Networking Computer) enabled so that they can remote into their machines. I don't recommend allowing access outside of your network when running a publicly exposed web server.
Apache Web Server
If you are serving web content world-wide then you'll eventually want to adopt some sort of blacklist, or exclusion list, where you can keep specific IP addresses from accessing your server. However, if you want to tighten-down your security and only allow a select few access then you'll need to make some changes.
cd /etc/apache2
sudo cp apache2.conf apache2.conf.bak
sudo vi apache2.conf OR sudo nano apache2.conf
Travel down the file until you reach this section that allows everyone access to your web server from the outside:
 Options Indexes FollowSymLinks
 AllowOverride None
 Require all granted
The AllowOverride directive is set to None meaning we will not be using an .htaccess file to override these settings. The next directive, Require is set to all granted, meaning allow anyone access.
UPDATE: I have found a significant number of bot requests in my log files, snooping for those of Us using phpmyadmin, be sure to limit access:
    Require ip 127.0.0.1
    Require ip ::1
    # Local-Area Network - update with your subnet
    Require ip 192.168.1.0/24
★ 2024 Insight: The original article used Apache 2.2 syntax (Order Deny, Allow) which was deprecated in Apache 2.4 (released 2012, standard since Debian 8). Modern systems use Require ip syntax. The old syntax still works via mod_access_compat on many systems, but updating to 2.4 syntax ensures compatibility and future-proofs your configuration.
Next, we can add a directory that we want to protect:
 Options Indexes FollowSymLinks
 AllowOverride All
The AllowOverride directive is set to All meaning we will be using an .htaccess file to override these settings. We will provide the Require directive in our .htaccess file inside the directory we specified, in this case, "/var/www/html/hydroMazing/" One last setting of importance before we save:
# AccessFileName: The name of the file to look for in each directory
# for additional configuration directives. See also the AllowOverride
# directive.
#
AccessFileName .htaccess
You could change the name of the .htaccess file here to something harder to guess. Keep the dot at the beginning because it means hidden file. Use your imagination 😉 Now you can use an .htaccess file as your whitelist, or inclusion list:
To create a .htaccess ( or whatever you've named it ) file:
cd /var/www/html/mydirectory/

sudo vi .htaccess OR sudo nano .htaccess
# Allow access to localhost
Require ip 127.0.0.1
Require ip ::1

# Allow access to specific IPs (update with your actual IP)
Require ip 192.168.1.50

# Deny all others (implied when using Require)
# Or explicitly:
★ Tip: You can view your current IP address at https://ipinfo.io or by running curl ipinfo.io/ip from your device. For dynamic IPs, consider using a VPN like Tailscale instead of IP whitelisting.
Second entry is an example — change it to your IP address (you can find this by running curl ipinfo.io/ip on the device you want to allow). Save and close the file. You can add additional access as desired.
Quick feedback
Did this guide help?
Your answers shape what we write next.
Build a Wall
Install the open-source firewall builder (GUI-based firewall configuration)
sudo apt install fwbuilder
★ 2024 Insight: fwbuilder has been largely unmaintained since 2016. For modern headless Raspberry Pi servers (without GUI), consider
ufw (Uncomplicated Firewall) instead:
sudo apt install ufw
sudo ufw allow 80/tcp
sudo ufw allow 443/tcp
sudo ufw allow from 192.168.1.0/24 to any port 22
sudo ufw enable
This provides the same functionality with active maintenance and simpler command-line management.
After the installation has completed, you will have a new option under the Menu/Internet option from your desktop for the firewall builder GUI.
Add a new firewall and name it the same as your server.
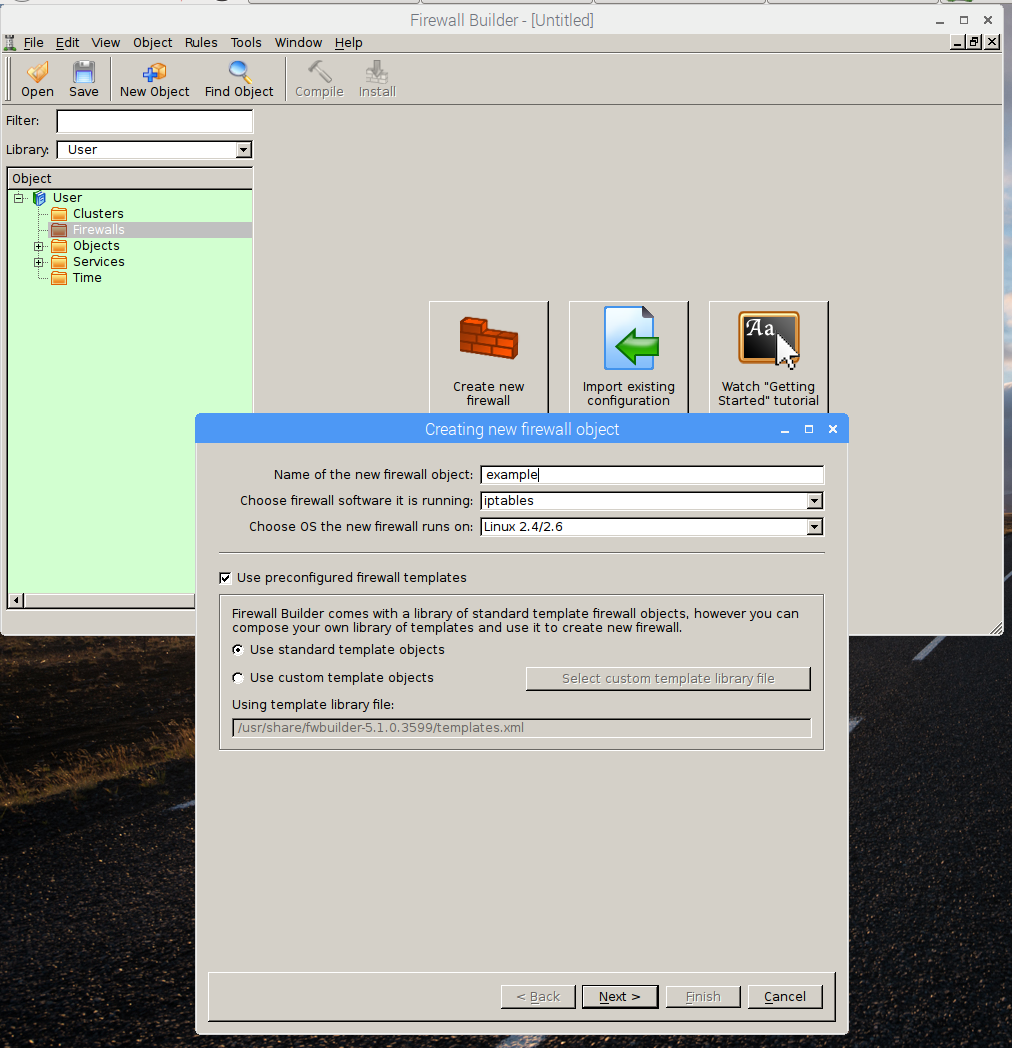
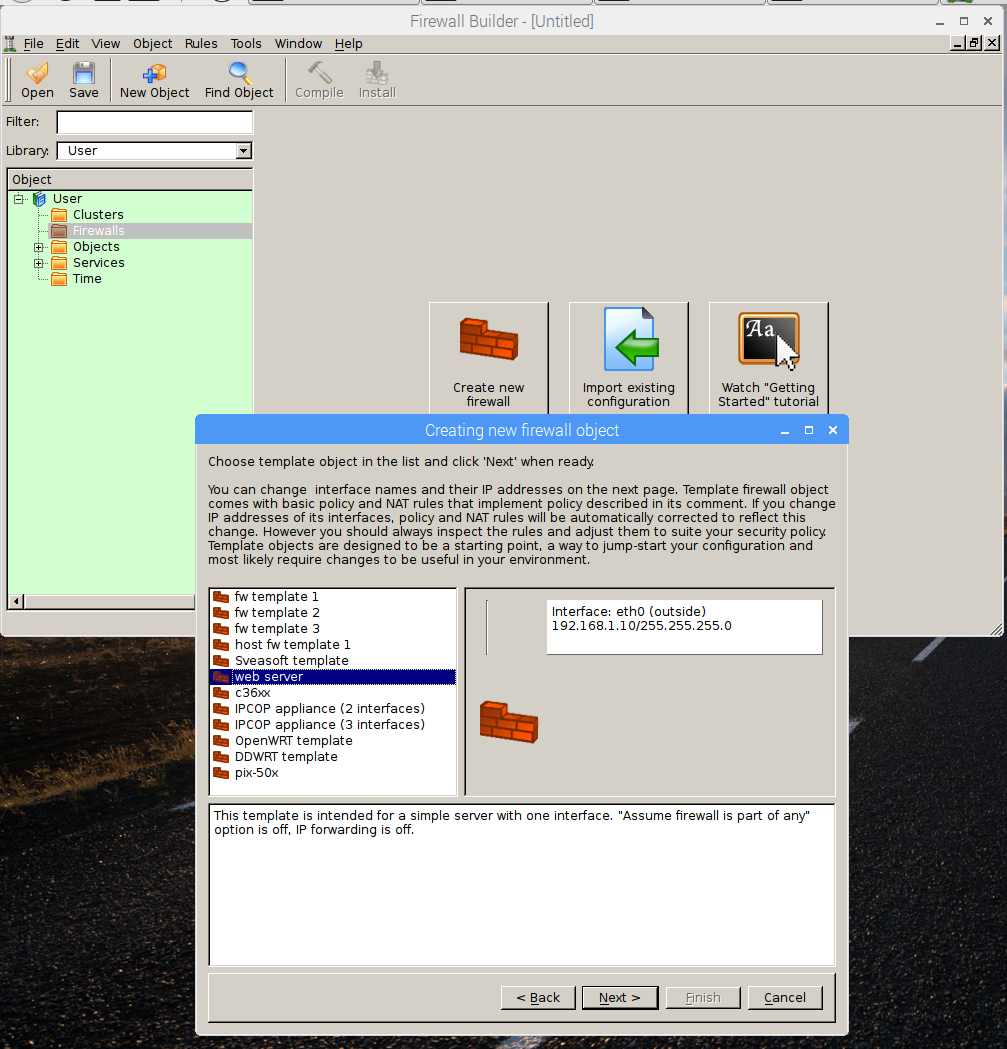
Select the "web server" template to load default rules.
Note that the default rules restrict your server from accessing the outside Internet. In order to allow access, you'll need to add a rule. The easiest way to add a rule is to copy an existing rule that is similar to your needs.
Compile and Install
We can build our firewall through this interface, but we won't be able to install it because we won't have sufficient permissions to write to the file system. Enter the following at a terminal window's command line assuming you named your server the same as your DDNS name:
sudo mkdir /etc/fw
sudo touch /etc/fw/servername.ddns.net.fw
sudo chmod 644 /etc/fw/servername.ddns.net.fw
★ Security Note: The original article used chmod 777 (world-writable), which is a security risk. Use or 644 with appropriate ownership instead. Firewall rules should be readable by root only in production environments.
Now, you should be able to use the firewall builder program to compile and install the firewall. You can either restart the apache web server or simply reboot.
Anything incorrect, missing, or not working? Please let me know.
★ 2024 Addition — Automated Intrusion Prevention: Consider installing
fail2ban to automatically block IPs with repeated failed login attempts:
sudo apt install fail2ban
sudo systemctl enable fail2ban
sudo systemctl start fail2ban
This works alongside your firewall and Apache access controls for defense in depth. See the
Server Hardening guide for more security controls.